How To Sew Basic Hand Stitches
Last updated on May 26th, 2026 at 09:18 pm
Sewing by hand has always held a special place in my heart. There is something peaceful about slowing down, sitting quietly, and making something with your own two hands. Just a needle and thread can turn simple cloth into something useful, beautiful, and full of meaning.
For me, hand sewing is also a way to stay connected to the old ways and the generations before us. Long before stores and fast fashion, our ancestors stitched clothing, blankets, and household goods by hand beside the hearth. Every piece was made with care and meant to last.
Over the years, I’ve sewn everything from simple pillows to dresses and cozy blankets right here on our farm. It has become one of those quiet skills that brings both usefulness and joy into daily life.
Today I want to show you a few basic hand stitches that I use often, in hopes that you’ll discover the same satisfaction that comes from creating something yourself.
So gather your fabric, thread your needle, and let’s sew together.
Please read our Disclaimer and Terms & Conditions


A Few Simple Stitches Every Homemaker Should Know
Today we’re going over three simple stitches that I use again and again around the farm and home:
- Running Stitch — simple, versatile, and perfect for beginners
- Backstitch — strong and dependable for clothing and repairs
- Railroad Stitch — a neat hidden stitch for closing seams beautifully
I’ll also share a few little tricks I’ve learned over the years, including how to hide your knots for a cleaner finish.
Running Stitch

The running stitch is one of the simplest and most useful hand stitches you can learn. It works well for seams, mending, gathering fabric, and even decorative stitching.
Instead of sewing one stitch at a time, I often weave several stitches onto the needle before pulling the thread through. It creates a steady rhythm and makes the work go a little quicker once your hands get used to it.
To learn an easier way to knot the needle read this blog post. marrying your needle and thread and tying a knot
How To:
- Thread your needle and tie a small knot at the end of the thread.
- Bring your needle up through the fabric from the underside.
- Weave the needle in and out of the fabric in a straight line, picking up several small stitches as you go.
- Pull the thread through gently, keeping the fabric flat. Avoid pulling too tight so the fabric does not pucker.

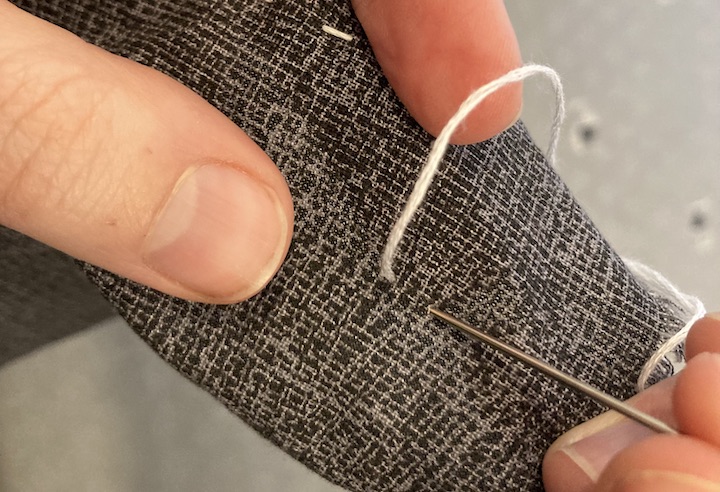
Start from underneath your fabric and bring the needle up through to the top.

Push the needle in and out of the fabric in a straight line, making even stitches.

Pull the thread through gently, keeping your fabric flat (don’t pull too tight or it might pucker).
Backstitching

SThe backstitch is one of the strongest hand stitches and the one I rely on most when sewing clothing or repairing items that need durability.
I especially use it in areas that take more strain, like seams, hems, and underarms. Once finished, it creates a solid line of stitching that holds up well over time.
How To:
- Bring your needle up through the fabric.
- Take a small stitch backward, inserting the needle behind where the thread last came out.
- Bring the needle up one stitch length ahead.
- Continue this rhythm, always stitching back into the previous point.
At first it may feel slow or awkward, but with practice your hands will find the rhythm naturally.

Thread your needle and bring it up through the fabric.
Take one small stitch backward, inserting your needle behind where the thread last came out.

Now bring the needle up a stitch-length ahead and repeat, always sewing “backward” into the previous stitch.


Once you feel comfortable with this stitch, you can speed up the process by weaving the needle into the fabric like a running stitch, going only to the next stitch.
Railroad Stitch

This is one of my favorite finishing stitches. My grandma taught me this method, and it completely changed how I close pillows, stuffed animals, and other soft projects.
It is similar to a ladder stitch, but instead of tightening at the end, you work the stitches inward so the seam stays hidden as you go.
How To:
- Fold both raw edges of the fabric inward to form a clean edge.
- Bring your needle up through one folded edge.
- Insert it directly across into the opposite folded edge.
- Continue alternating sides, creating small hidden stitches across the opening.
- Pull gently as you go to close the seam evenly without puckering.
This stitch takes a little practice, so be patient with yourself. It becomes easier each time you use it.

Fold the two edges of your fabric inward to form a tunnel on each side.

Bring your needle up through one side, then insert it directly across into the other tunnel.
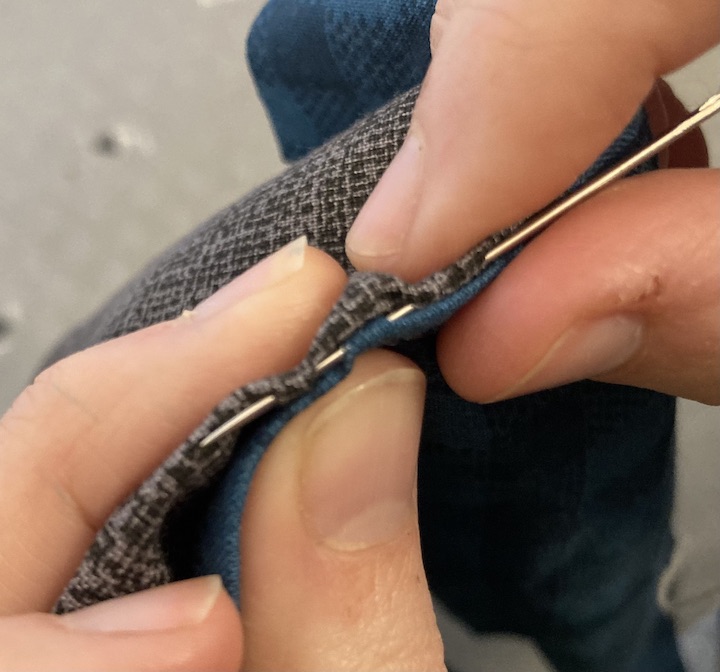
Keep alternating sides, creating little “rails” across the gap—hence the name! Pull gently as you go, just enough to close the seam without puckering.
Go Make Something Beautiful
Hand sewing is more than just a practical skill. It is a quiet kind of work that builds patience, steadiness, and care.
In a world that moves quickly, there is something good about slowing down long enough to mend, stitch, and create again.
So don’t worry about perfect stitches.
Just keep practicing.
Every piece you make will teach you something new.
If you would like to learn how to thread your needle, tie your knot, and prepare your thread, you can find that guide here.
And if you make something using these stitches, I would truly love to see it. Share it with us in the comments or over on the farm page.